

Vicinity Location:
About 21 miles northeast of Portland, OR.
Directions:
Driving I-5 northbound:
Drive about 16 miles from Portland and take exit #11. Continue on the exit ramp for about .6 mile and turn right onto NE 219th Street. Follow signs to city of Battle Ground and drive to the east end of town. Turn left on Grace Ave. (in front of Foodliner Grocery), and follow signs to park, approximately three miles from the city of Battle Ground.
Driving I-5 southbound:
Take exit #11 which will cross over I-5 and turn into NE 219th Street. Continue east on NE 219th Street and follow signs to city of Battle Ground. Drive to east end of town. Turn left on Grace Ave. (in front of Foodliner Grocery), and follow signs to park, approximately three miles from city of Battle Ground.
A State of Washington Discover Pass is required for parking. Crowds of people make it difficult to find parking on summer weekends.
Flush toilets available near the trailhead. Outhouses available along the trails.
Dogs must be kept leashed.
Length and Elevation:
Three loops totaling 4.75 Miles. Elevation gain and loss is 1,100 feet total. Elevation at the trailhead is 550 feet and the high point is 730 feet. The low point is 500 feet.
Trail:
No named trails
There is at least one geocache along this trail at: N 45° 48.363 W 122° 29.763 Info at Geocaching.com
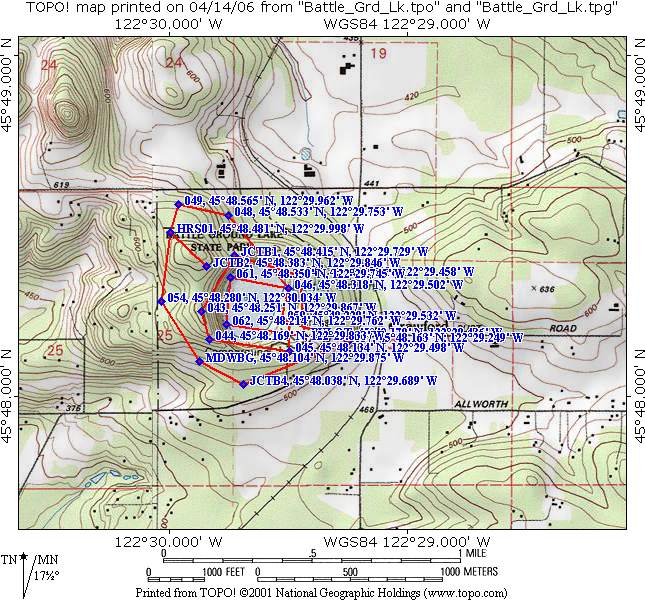
Trail Maps:
Topo Map, State Park Map, Download Garmin .gpx file
History:
This area was named for a battle that never happened in 1855. Captain Strong, the post commander of Fort Vancouver, allowed a group of Klickitat Indians to leave the fort on the promise that they would return after burying their chief, who had been accidentally killed. Most fort residents thought the Indians wouldn’t return, but would fight. Settlers called referred to where the expected to fight was to take place as “Strong’s Battle Ground.” The Indians, true to their word, returned to the fort peacefully, Settlers continued to refer to this area by the nickname. Over time, the area changed to be called “Battle Ground.”
The lake’s origin is volcanic. It is thought to have been formed as a “Maar” volcano, which is the result of magma pushing up near the surface of the earth and then coming into contact with underground water. This created a large steam explosion, leaving a crater that filled in with water.
Review: April 7, 2006, July 20, 2010, February 5, 2011
At the north end of the parking lot is a sign showing the trails in the park. From the sign, take the trail to the right and walk past the play area and make a right at the sign that says “site #36 – 50 on the paved trail around the lake.
The pavement changes to a dirt path about 500 feet from the play area. Bear left at the first trail sign. Staying on the main trail, you’ll pass campsite 45 on your left. Soon you’ll intersect the first horse trail on the northwest side of the lake. Just before you get the horse trail, marked by two trail signs, make a left towards the lake on a small footpath. You’ll come to a 4×4 wood junction post. Take the trail to the right, marked horse trail. This will take you past a concrete water storage tank. Take the next two left trail junctions and continue on the horse trail on the east side of the lake.
The trail goes downhill to a junction with another horse trail. This part of the park has mossy trees with ferns growing on them. At the next trail junction, make a left back towards the parking lot. Stay on the main trail. Soon the trail ends at a metal gate and a paved road. Now in the campground, make a left and head east back towards the parking lot and the lake.
Take the road through the campground and back to the parking lot. From here, head north down to the lake for the second loop.
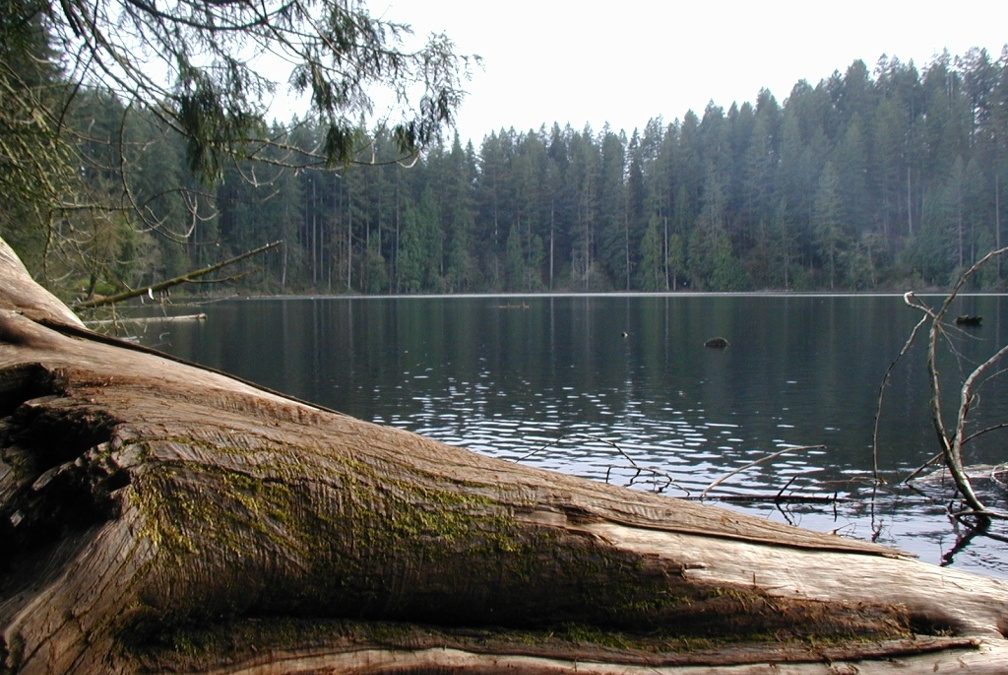
At the bottom of the hill, turn right and follow the trail along the shores of the lake. Most days you’ll see people picnicking and fishing along the lake. The main trail goes back uphill to join the trail around the ridge of the lake. Springtime flowers include trillium and candy flowers.
On the second loop, make a right where you can see the two trail signs, make a right, and go downhill on the horse trail. This part of the trail has some muddy spots that are hard to avoid. Other than the mudholes, the trail is nicely graveled. At the next junction turn left and head around the perimeter of the park back uphill. Stay on the main gravel trail. After a bit, you’ll come to a horse camp. At the horse camp, look for the sign for Marshall’s lookout and follow the path towards the lake. This part of the trail has several big muddy patches. Follow the signs to Marshall lookout. You’ll reach a bench overlooking the lake that is dedicated to Charlie and Vivian Marshall.
Follow the trail past the bench and turn left, up the hill, and join the trail back to the horse camp. Back at the horse camp, turn left at each of the next two trail junctions, staying on the gravel trail and heading generally south. You’ll probable see several horses along the trail. Remember horses have the right of way. When you see a horse coming, stop and stand out of the way, but where they can plainly see you, so you don’t spook them, and wait for them to pass.
Turn right where the trail pass the private homes just outside the park. This will keep you on the trail around the perimeter of the park. Soon you’ll pass through a large meadow on the southwest corner of the park. Stay on the gravel horse trail and it will take you back to the entrance road to the park. A short distance after the meadow, you’ll come to a 4-way junction. Go straight at this junction or you could end up at the wrong road. Near the equestrian parking, continue on the right junction of the trail and this will shortly take you to the park entrance road.
The last loop is on the lakefront trail. Turn right at the boat launch area and pass the little beach. Where the main trail goes uphill, turn left onto the small footpath that stays approximately level with the shoreline of the lake. This trail gets narrower and rockier as you follow it around the lake. Follow the lakeshore trail around the lake back to the boat launch ramp. Head backup the paved road back to your car.
Now, you can go back to the car, go to the lake to picnic or swim, take the kids to the playground, or fish at the lake.
Enjoy the photos!!
Gallery Pics
Switchback Steve
Recent Comments